How to Draw Leaves Step-by-Step
Do you want to build your botanical painting and drawing skills? You’re going to need to know how to draw leaves. When you learn how to draw leaves in different perspectives, it will instantly elevate your botanical artwork.
In this tutorial, you’ll learn how to draw leaves that are bent and twisting at different angles so that your foliage looks more organic and natural.
All you’ll need for this drawing tutorial is something to draw with and something to draw on!
Drawing a Basic Leaf Shape
The foundation of a leaf is its center stem. Leaves always follow this central line, so you’ll want to start by determining where this is.
Sketch a slightly curved, dotted line on your paper to start. Then, draw the edges of the leaf connecting at the top and the bottom of that line.
Try drawing the center line at different angles to explore different ways of drawing a basic leaf.
Drawing Folded Leaves
In nature, most leaf shapes aren’t actually a perfect front-facing leaf like the one we just drew. Most leaves have some kind of bend or twist to them. If you want to make your drawings look more true to nature, these next steps on how to draw folded leaves are going to blow your mind!
You’re going to be so impressed by what you can do and how easy it is to draw leaves that are bent and folded over.
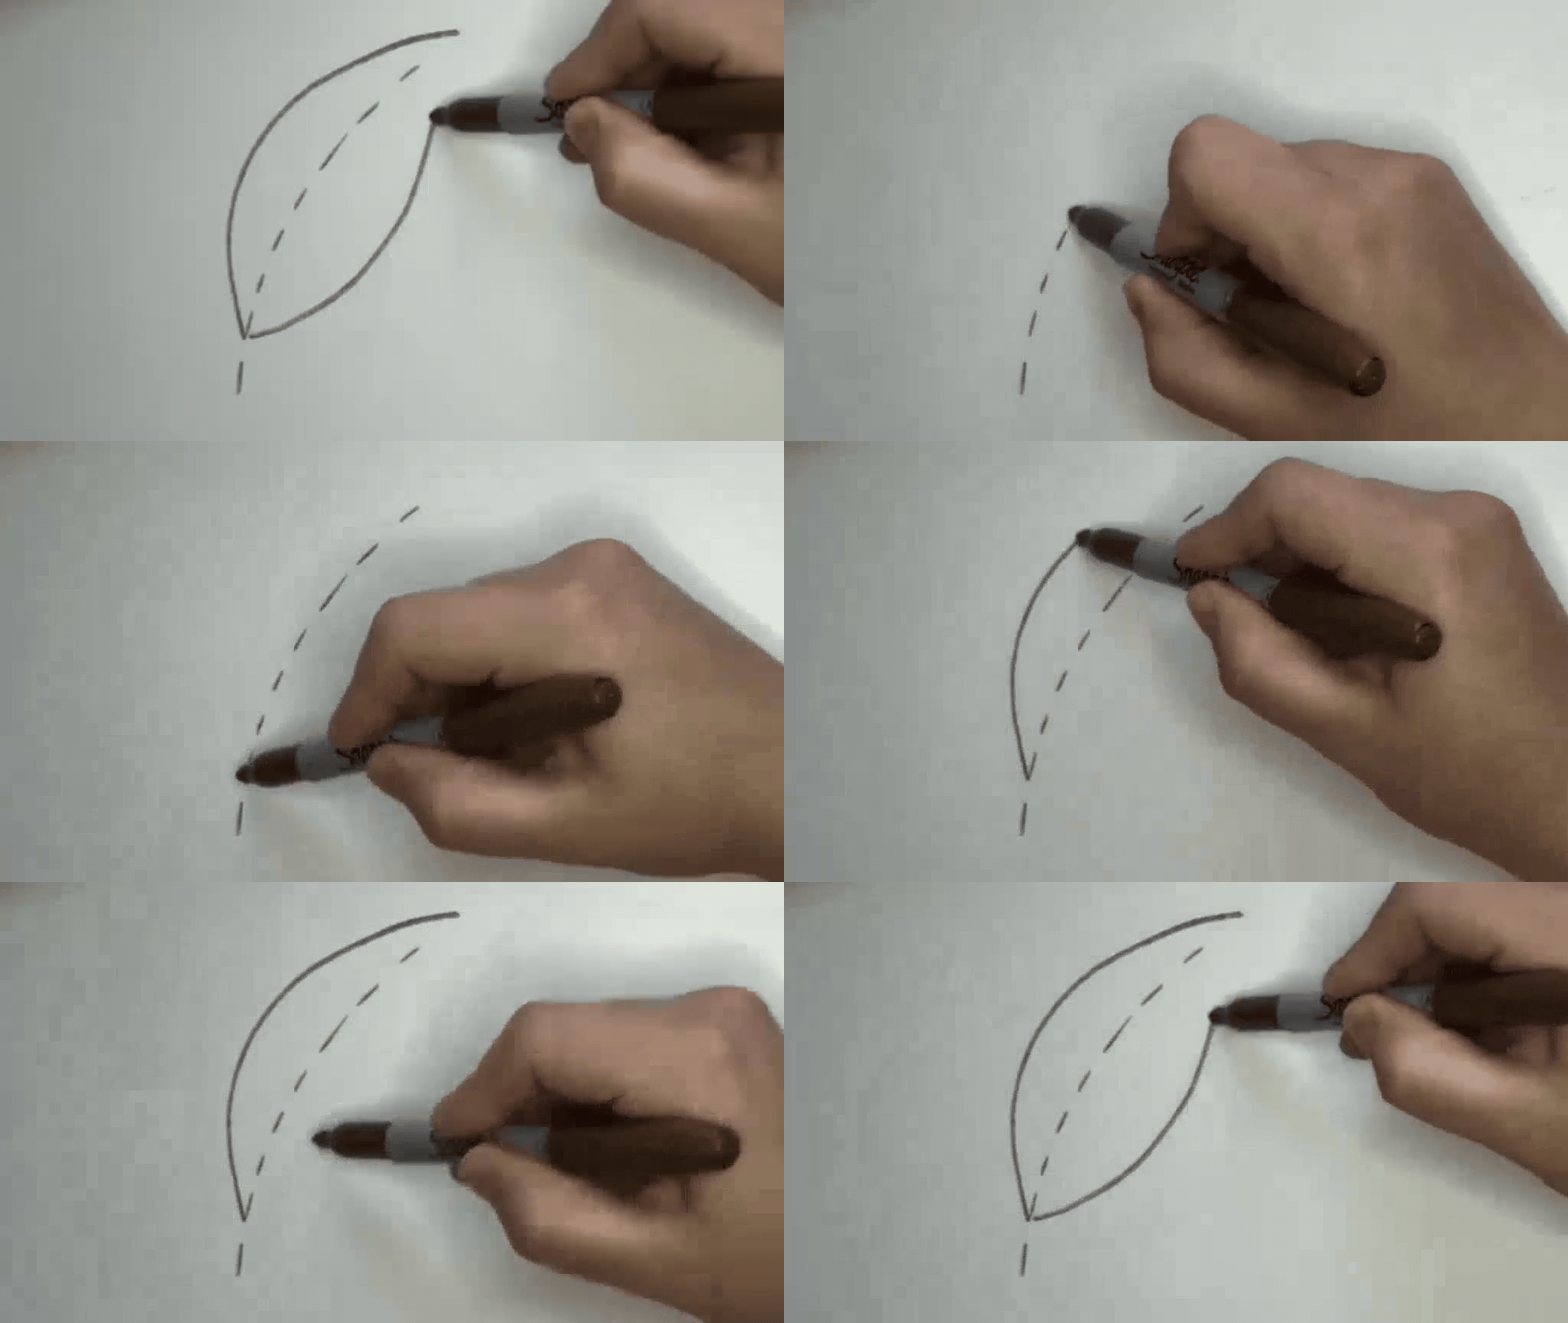
Step 1: Center Line
Start by drawing the center line of the leaf. You can do this using a pencil since it is just there as a guideline to help show where to place the other parts of the leaf. I’m drawing with a Sharpie so it shows up on camera, but I’ll use a dotted line to differentiate it as a guideline.
Draw a ski slope shape to start.
Step 2: Side Line
Next, we’re going to draw a line that marks the edge of the leaf. Go a little bit to the left of the line and then draw that same curved shape crossing over the center line and meeting it at the bottom.
Step 3: Second Side Line
Now, we’re going to draw the other edge of the leaf. We’re going to “copy and paste” the same line, but this time on the right side of the guideline. Go to the right of the guideline and draw the same hill shape crossing over and meeting at the bottom.
Step 4: Connect the two sections and add a stem
Draw a straight line at the peaks of your two edge lines, and now you can see the bent leaf start to take shape!
Lastly, connect the leaf at the bottom and add a stem.
Step 5: Indicate which way the leaf is bending
This leaf can either look like it’s bending toward you or away from you depending on which of the overlapping lines you erase. See that “x” at the center where the two side lines cross? You want to remove one of those lines to determine which way you want the leaf to bend.
Since I used a Sharpie and can’t erase my lines, I’m going to shade in the area that I would have erased if I were using a pencil. Now you can more clearly see which way the leaf is bending! The shaded part is the top of the leaf, and the white part is the underside.
Folding to the left
You can recreate this shape facing either direction by simply flipping the order of how you draw things. To draw this on the other side, start by moving to the right of the guideline rather than the left.
Tip: This exercise can be a little brain-bending, so remember that this is just practice and it’ll take a few pages of sketching and observing the results of your sketches to grow more confident drawing leaves. That is normal!
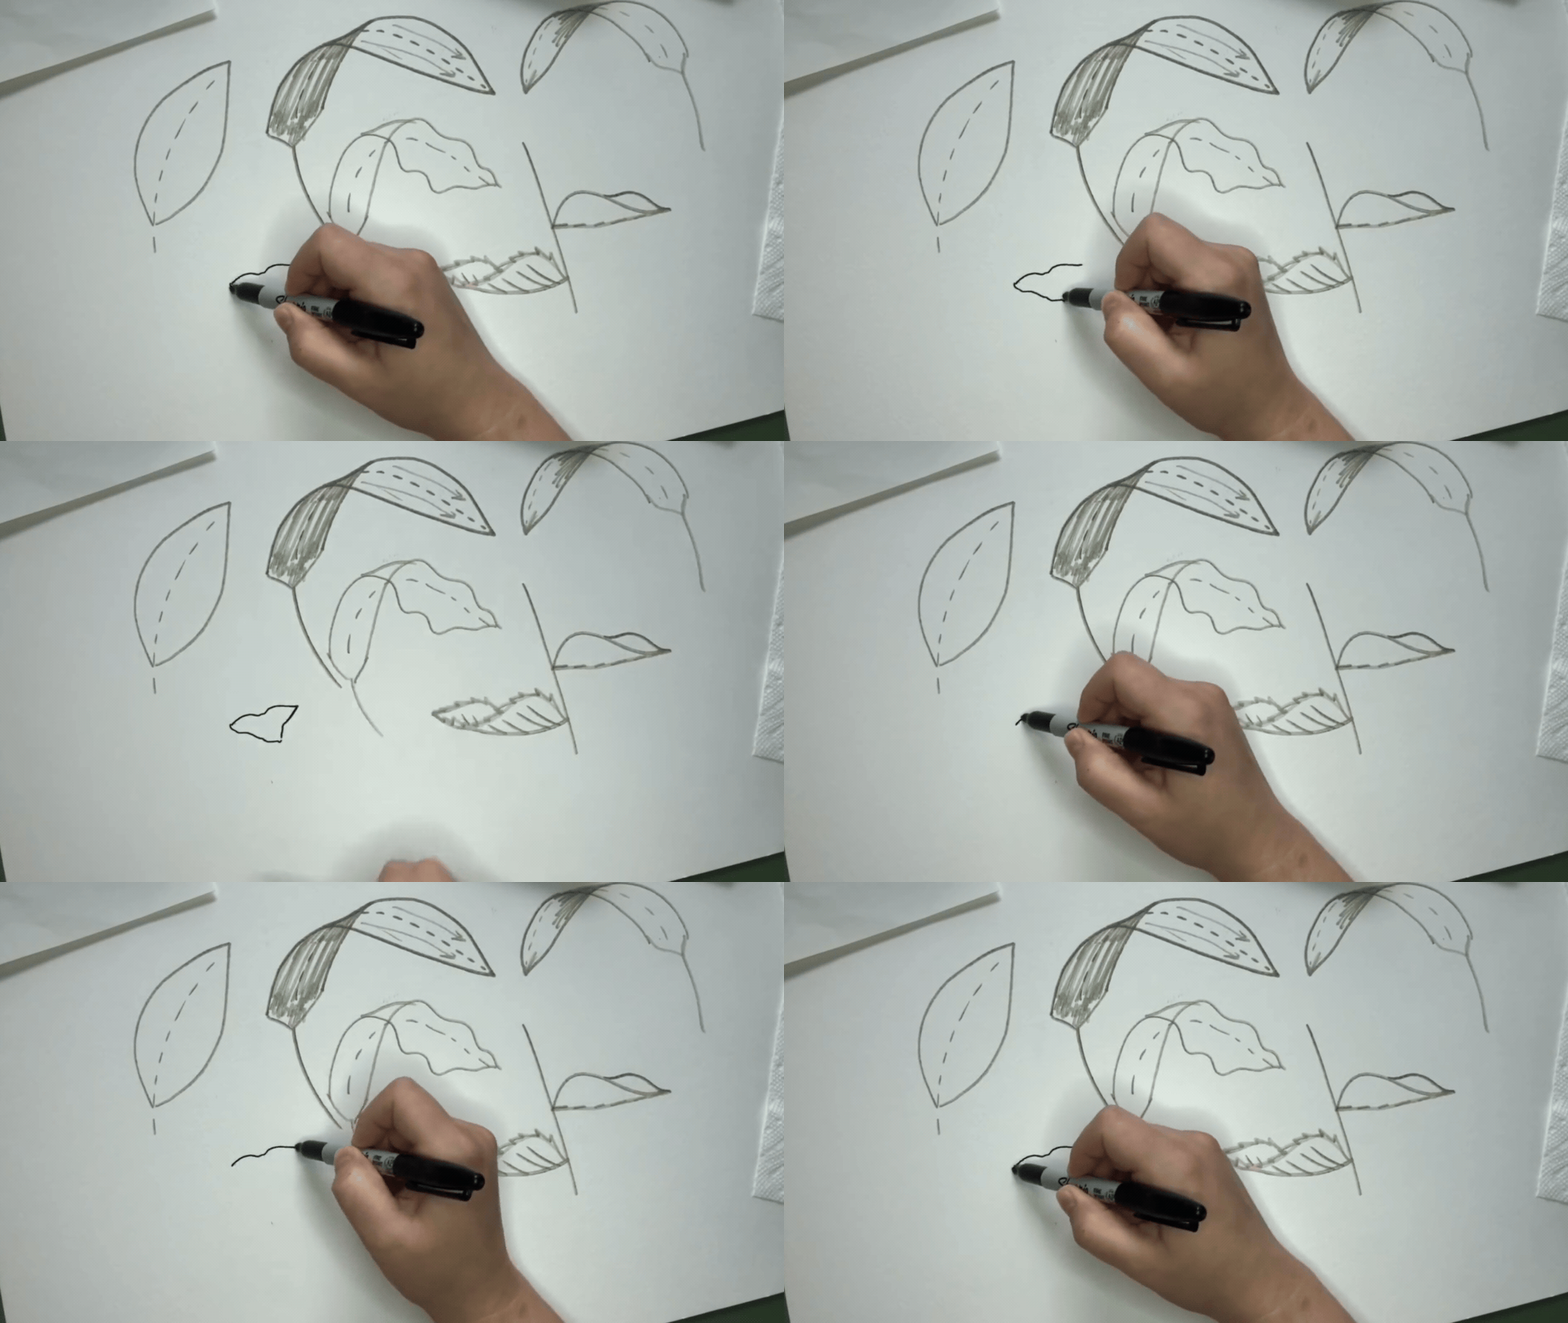
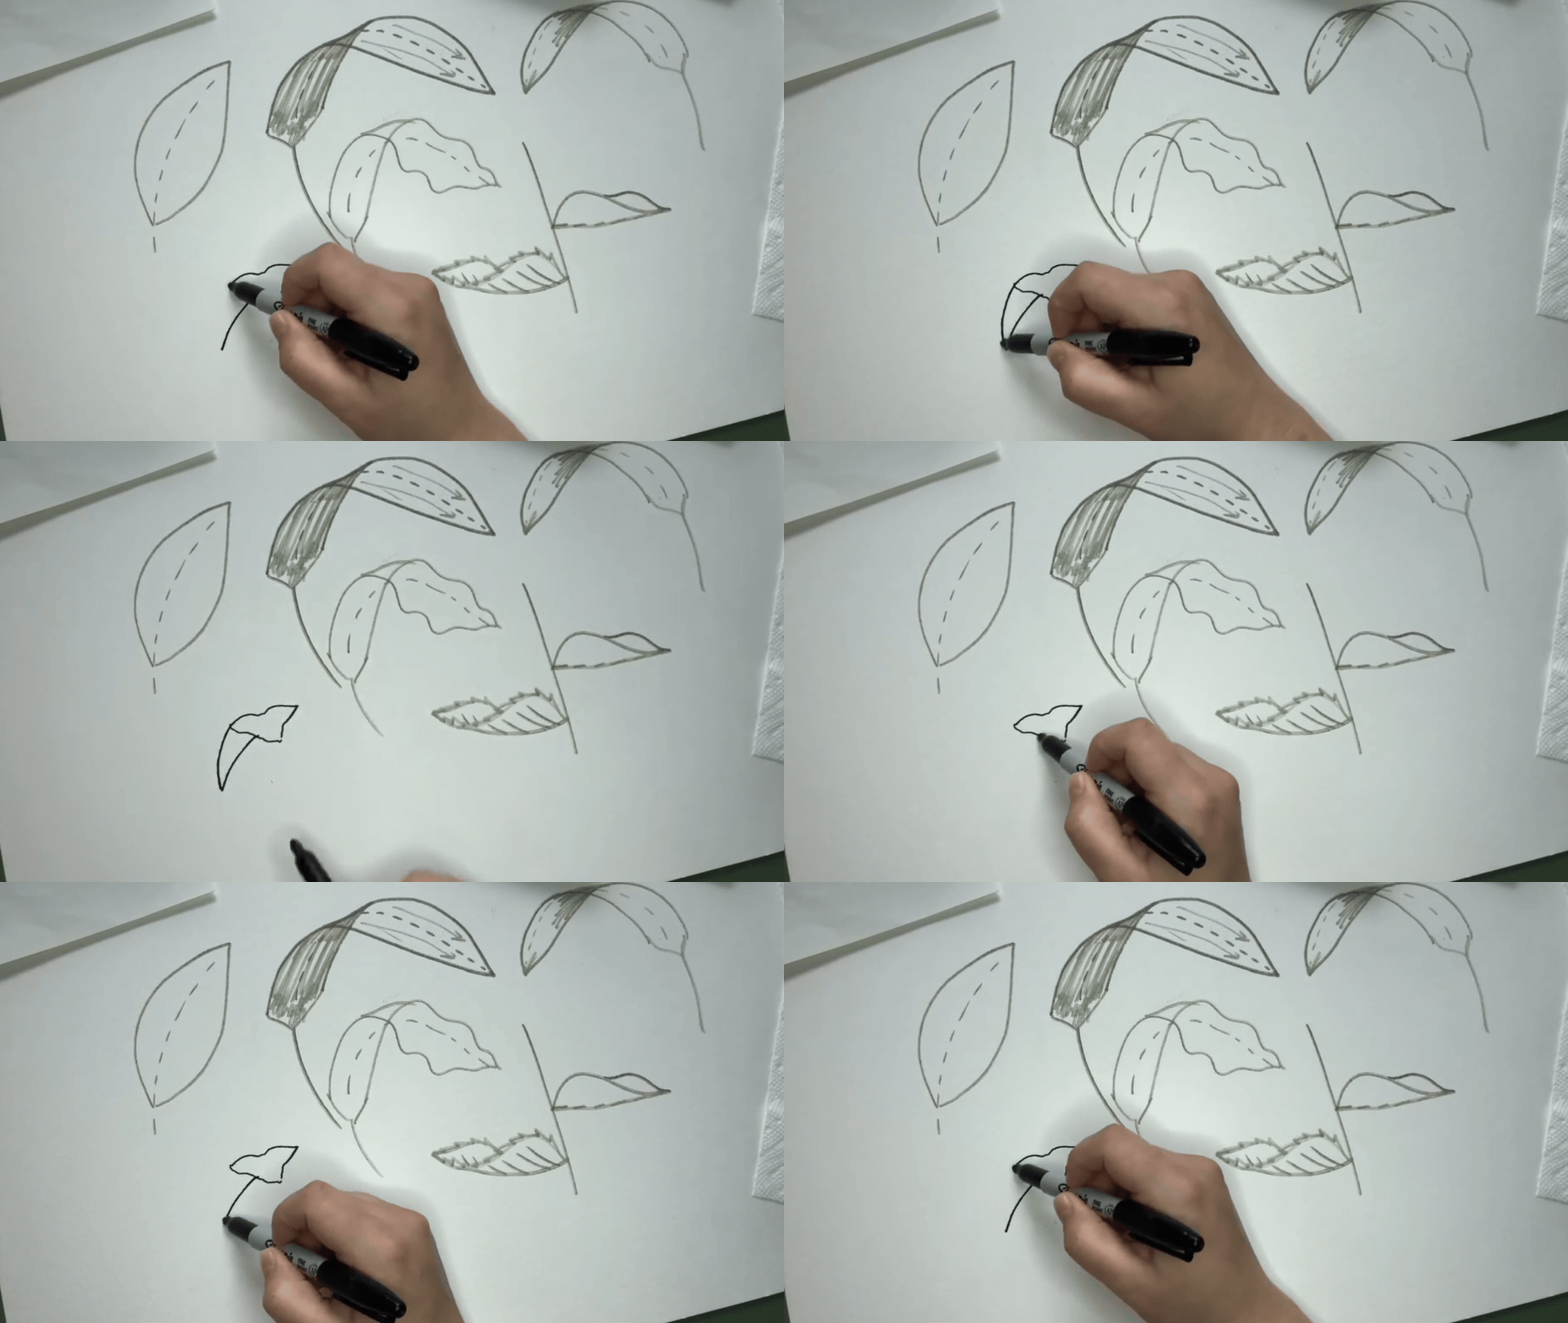
Folding forward
If you want to draw a leaf that looks like it's folded toward you, start by drawing a rough, sketchy bat shape. You can also think about it as a bad drawing of a heart. There are no hard and fast rules here! Nature is imperfect, so that’s what we’re going for with this wobbly shape.
Next draw a curved line coming out of the center of one side. Draw a second curved line coming from the tip of the bat shape that connects with the first line.
You can add the stem, center line, and veins to help show that it’s a leaf. This will help you visualize it better so you can understand how to fit this type of leaf into your compositions.
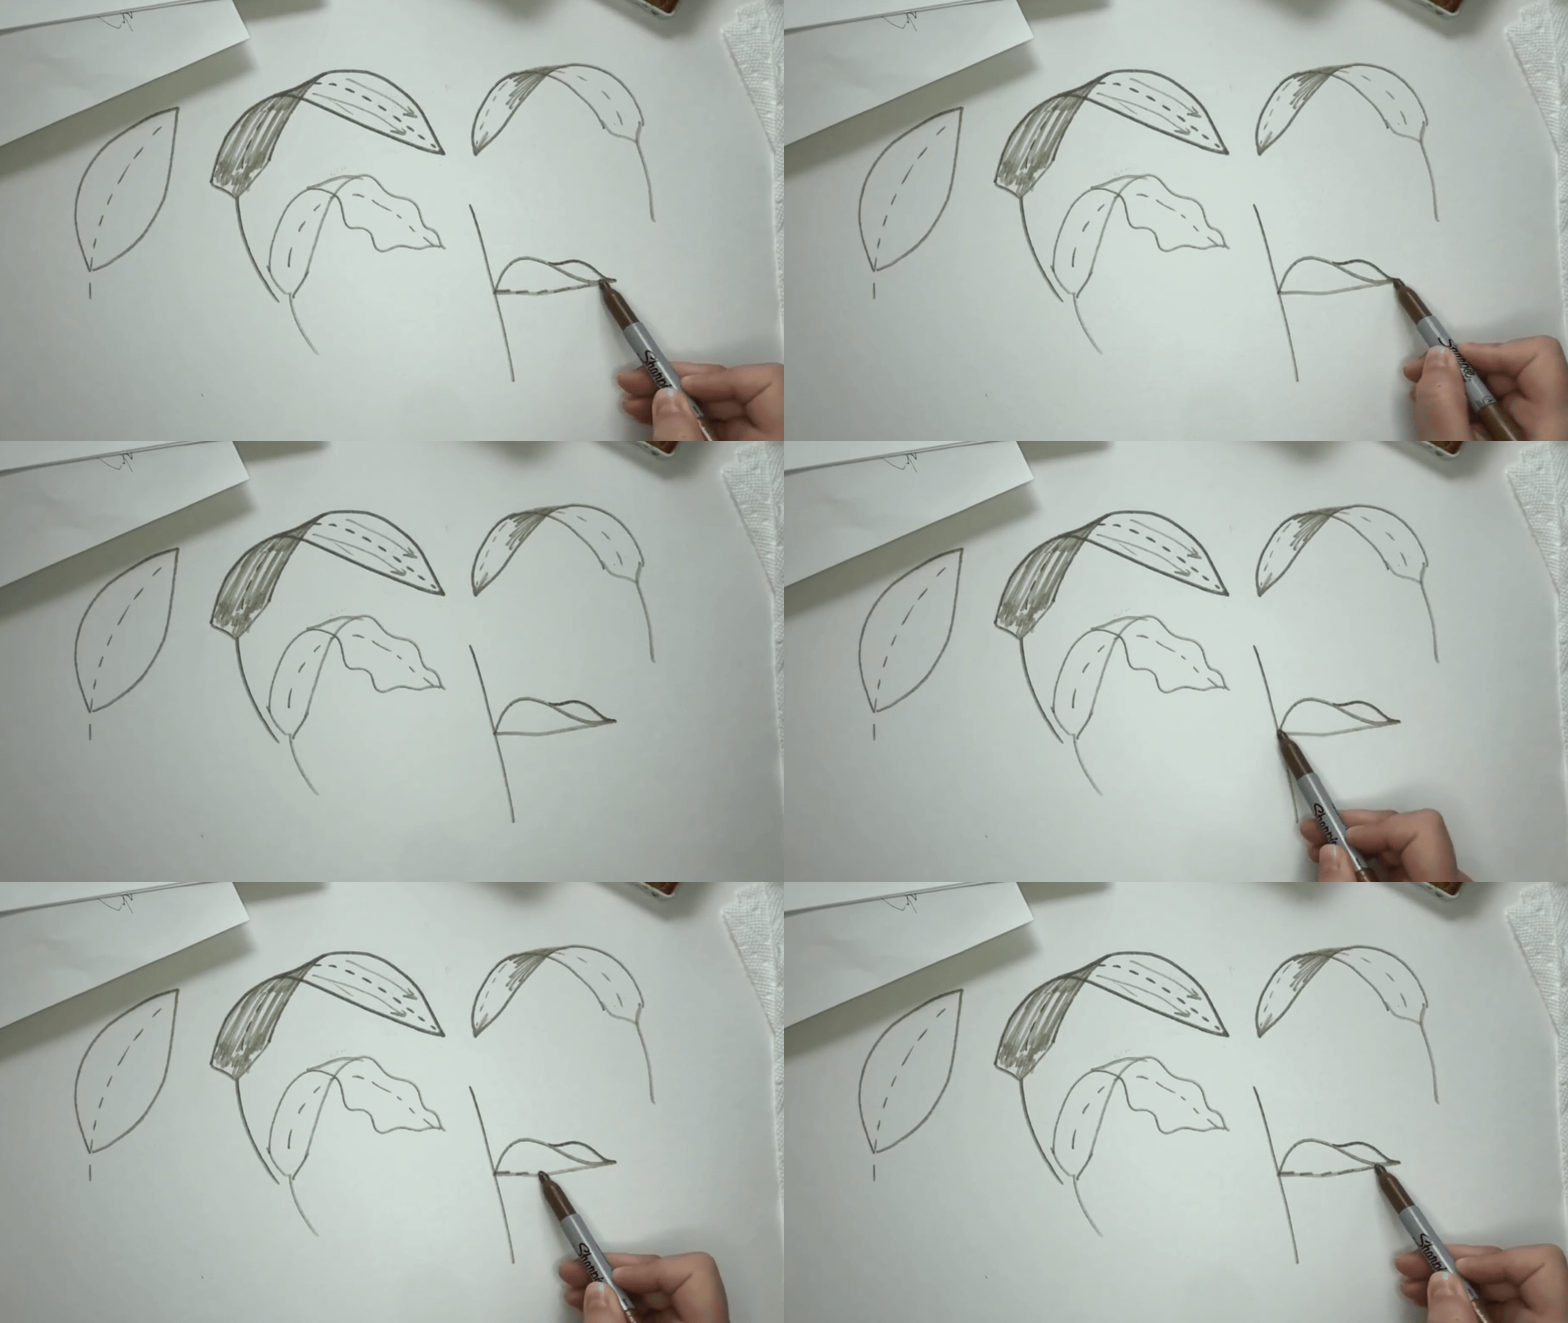
Drawing Twisted Leaves
Have you ever seen leaves that are twisting up on the sides? Almost like they’re curling in on themselves? Let’s learn how to draw that type of leaf!
Start by drawing the stem of the flower. Then draw a hill shape coming out of the stem.
Next, draw a smaller hill shape that meets the big one at the tip.
Finally, add a straight line to connect them. The center vein of the leaf is actually going through the bottom line. Since we’ve drawn this leaf in perspective and are viewing it from the side, it feels like the part of the leaf that’s closest to us is curving inwards.
Adding Unique Details
Now that you understand the basics, you can use these techniques as the building blocks to draw any leaf you like! Say you’re drawing a rose which has leaves with serrated edges. You can easily add serrated edges to any of these types of leaves to fit with the composition you’re working on.
And this is just the tip of the iceberg. Now that you know the basics, you can build on this to make more complicated and interesting leaves.
You can experiment with other details like ridges, veins and shading. You can also change up the size of your leaves to fit the piece you’re working on. These basic leaf drawing techniques are here to give you the foundation of what you need to know. Once you’ve got the basics down, the creative possibilities are endless!
I hope that you enjoyed this leaf drawing tutorial. Let me know what other step-by-step drawing tutorials you want to see in the comments!
Happy drawing,
Alex
Learning to draw will help improve your watercolor botanical painting skills. If you want to dive deeper into the wonderful world of watercolor, check out my free guide for everything you need to know!


